|
Home Updates Hydros Cars Engines Contacts Links Racing ←2019 2021→ Contact On The Wire |
|
|
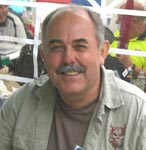
Oliver Monk 'Workshop Ramblings' 2020 |
 |
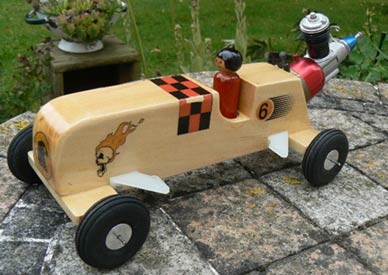 |
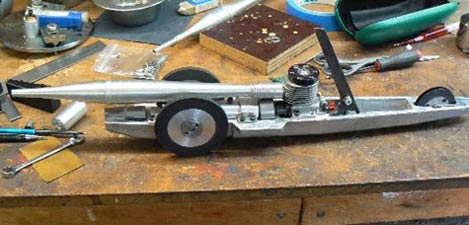
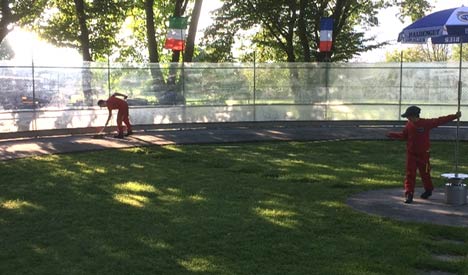
This is a picture from the Grand Slam race in Basel last August, there are worries that our sport is slowly dying out. It was good to see these two young lads Janis and Laurin learning to horse. They used an old retired Class 3b car with no engine. The second picture is a Cox 049 car kit that I built for the lads, their father Philipp has built them a pole so they can run it on a local car park.
|
|
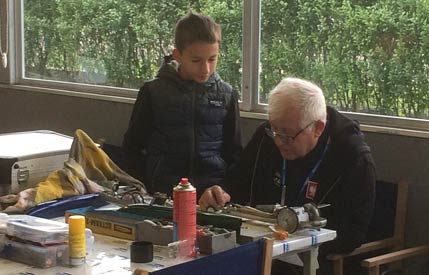
This is Edward Stelling helping Marek’s grandson Franciszek with his Class 3b car. Its good to see some new entrants to the sport.
|
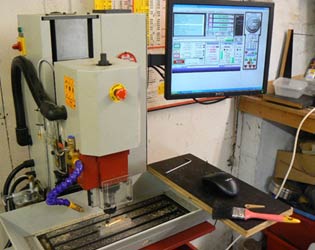
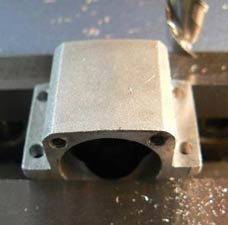
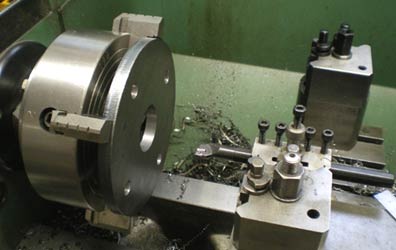
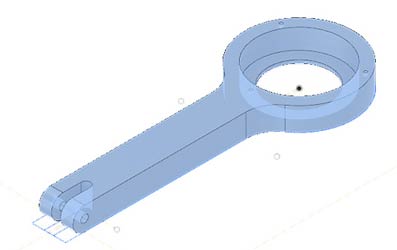
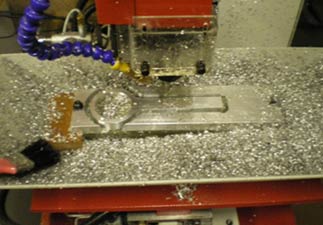
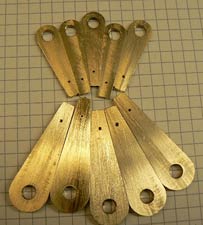
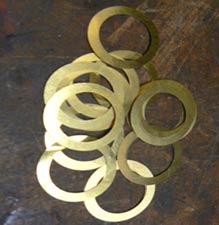
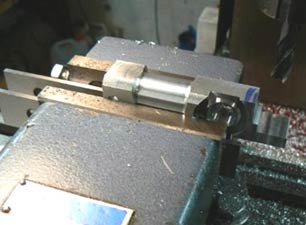
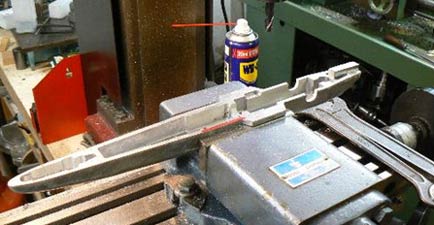
As some will know we are building a track in the UK initially for old timer and sport model cars. I have volunteered to build the centre pole, the flanges picture on the left were straight forward machining jobs made easier by being able to buy laser cut steel discs. The bearing carrier/cable attachment was not going to be so easy It was too big to fit in the lathe, so I decide to draw it in 3d and make it on my CNC milling machine.
 |
 |
 |
 |
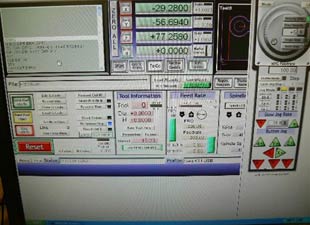
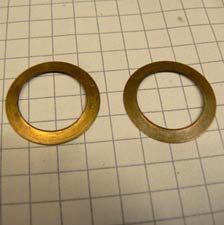
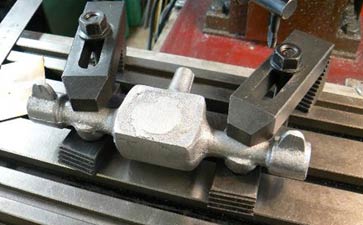
The mill certainly produced some swarf while producing it but at least it proved that my drawing and the producing of the code to make things is getting better. Right: The completed bearing carrier and the two collars to position it.
 |
 |
 |
 |
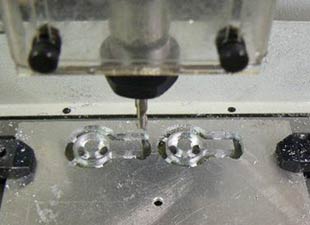
Still on with making bits for the new track, the CNC mill is getting a bit more use, certainly makes life a bit easier for some jobs. These parts are for cable ends.
 |
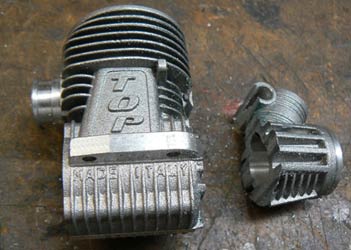 |
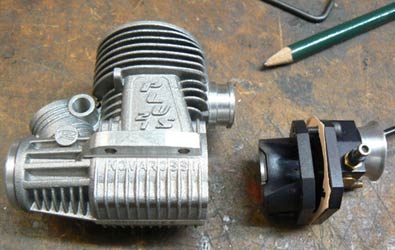
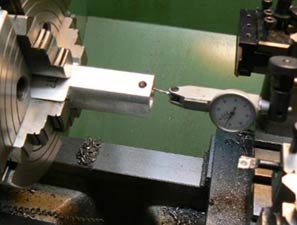
I have two engines for my 3.5cc car, one of them has never gone as fast as the other. So, I bought a new crankcase and a new Zimmerman disc assembly. The front housing on the engine felt good so that is going to be used along with the rest of the internals.
 |
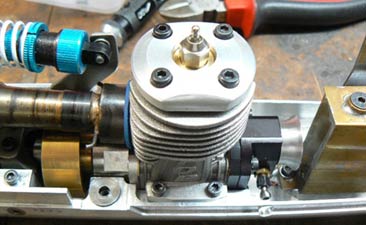 |
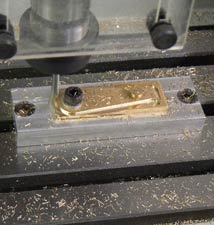
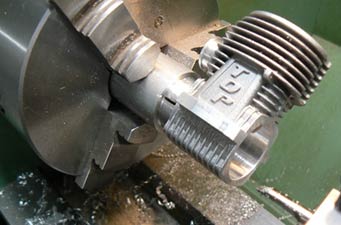
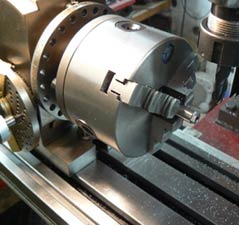
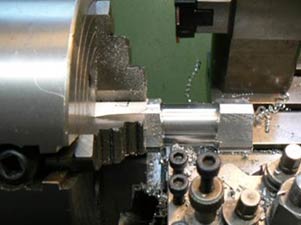
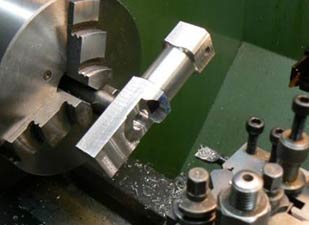
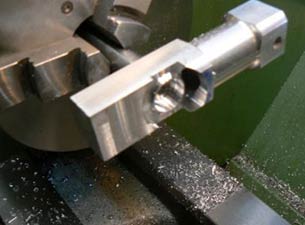
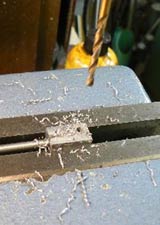
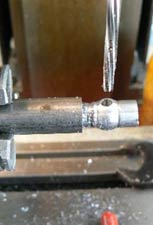
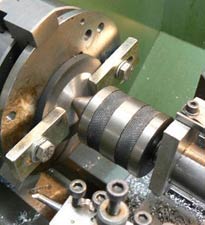
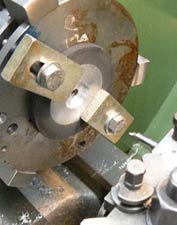
A mandrel was machined up to hold the crankcase casting to allow the case end to be squared off and the case to be bored out for the Zimmerman assembly just four holes to drill and tap to hold the back plate on and it was all done.
 |
 |
 |
 |
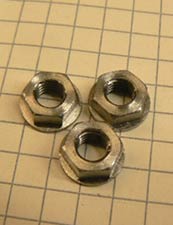
Another little time-consuming job a bit of turning and milling the hex head nuts to hold the flywheel on my 1.5cc engine. Before we went to Tallinn this year, I put a 1.5cc engine together from a box of spare Kapu 1,5cc bits we had. The shims were a bit tight on the head and put a tiny flange on the shim where it had been pushed into the liner. This also distorted the liner enough to affect the nip of piston in the liner. New set of big bore shims made.
|
|
Over the Christmas holiday we moved my son Aaron’s lathe, milling machine etc out of my workshop into his workshop at his new house. The CNC machine is now in my warm workshop.
|
|
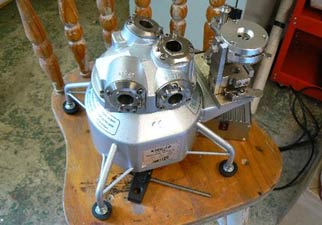
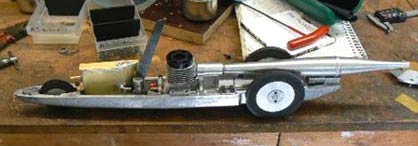
The next project is a car for Buckminster. I am going to do a table top build of an Oliver Mercedes castings and the new Redfin twin shaft engine which is on its way from Alex. Alongside this build I will do a full workshop build using another set of castings and a Eureka engine like the one in the picture. |
|
April 2020
As I write this we are all in lockdown at the moment, we now start the next three weeks of confinement to our homes. To an extent I am lucky I have a workshop to play in and lots of projects to be getting on with. I am going to write about what I have found interesting to do and hopefully not repeat myself too much.
 |
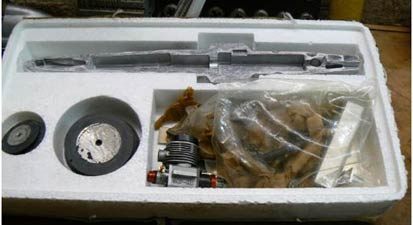 |
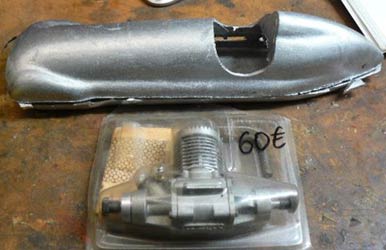
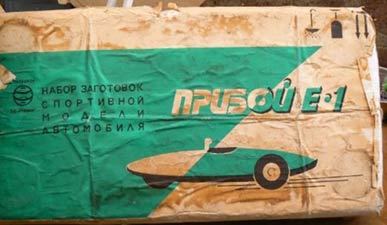
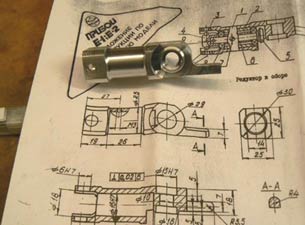
This is a Russian 1.5cc tether car kit from the 70s/80s I think, bought from a friend in Lithuania, why, well we have a new track at Buckminster and I wanted something to run that was glow engine powered. Hugh has one of these cars and my son Aaron is building one as well. We should be able to race against each other as a one car class perhaps. The engine in the box came from eBay for £40.
 |
 |
 |
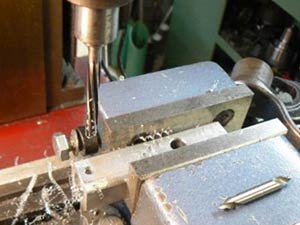
Decided to start with the most difficult bit the gearbox all fairly straight forward engineering. The aluminium block had the hole down the middle pre bored and the hole at the end drilled just centring the block up. The kit came with a full set of drawings and instructions all in Russian, Aaron showed me the latest Google translate app, you just pointed the camera in the iPad at what you want translating and it was amazing.
 |
 |
 |
Its really nice using modern tipped tooling now that tips especially for aluminium have become available, they are really sharp and silver coloured is what I am using in the second photo, standard HSS in the first photo.
 |
 |
The finish of the turning operations and the start of the milling, note the step in the back of the gearbox it has to be curved when finished. Rounding the end of the gearbox on the rotary table with the milling cutters, a roughing one removes metal fast and doesn’t make the mill struggle. The almost finished gearbox. It's really nice having a full set of drawings to work from, don’t normally have that luxury, just rough sketches with key dimensions that I have done.
 |
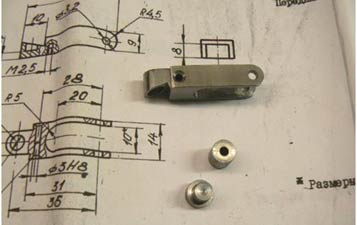 |
This is the front suspension nearing completion, just wanted to show this and the use of filing buttons to get the round ends the drawing shows. As they are only going to be used once I made them from mild steel rather than silver steel, which can be hardened and won’t wear out if used a lot.
 |
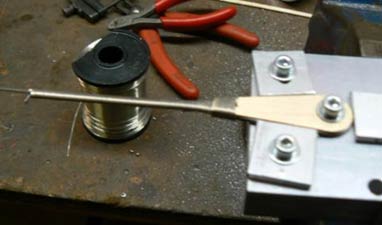 |
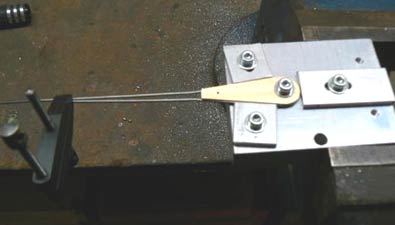
When we are allowed out to play again, we will need some cables for us to use at Buckminster, I made the brass thimbles on my CNC machine. I needed something to hold the wire in place whilst I bound it. Made a little jig, it works quite well and does both sizes of thimble.
 |
 |
The front wheels. These will be done to the FEMA regs that require the car to have 4 separate wheels but the front wheels can be fixed together. Drilling the three holes for the screws to hold them together. The second picture shows the bearing housing being bored out one ball race in each wheel.
 |
 |
 |
 |
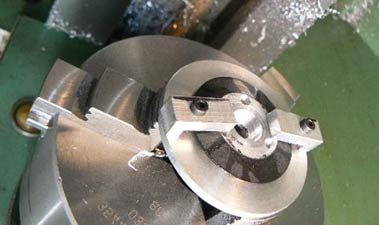
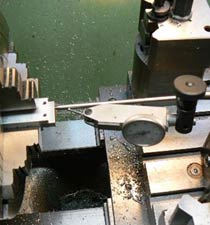
The start of the gearbox front mounts, one for each side. The second picture shows truing up the set up ready for machining the pivot boss. I spot drilled the centre of the boss in the milling machine. There is a bar between the spot drilling and a centre in the tail stock, the bar wobbles until it is true. Picture three, one of the finished gearbox mounts. And finally the axle for the gearbox getting it to size to fit the bearings. I don’t have a grinder to do this but a piece of emery on a parallel or other flat piece of steel works well using the bearing as a gauge.
 |
 |
Starting work on the pan, milling out the engine and gearbox mount, the universal joint in this car is quite an old design and needs to be set up very carefully to work. The engine has to be exactly inline with the gearbox centreline.
For something totally different started work on a Trackmaster car. This is the back axle, going to be a challenge drilling the hole through it.
That’s it for now, more next month. Yesterday the European Champs and the race in Kapfenhardt were cancelled, these are the two biggest events of the tether car season. Our cars are going to be so well prepared for the 2021 season with all this time we are going to have.
Workshop Ramblings May 2020
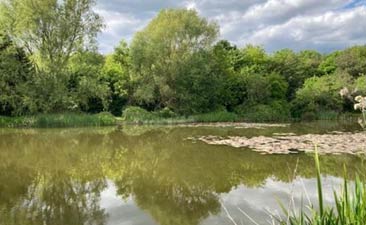
We have been given a bit of freedom this month so I have managed some fishing and a trip down to the field archery wood. To follow that they are opening Buckminster to season ticket holders, I am preparing a car or two to try our new track.
 |
 |
|
One of the lakes I am lucky enough to fish. |
High tech cutter grinder |
I bought myself a new toy it’s a machine for sharpening end mills, it only does the end not the flutes. It is quick to use and makes a good job, I had draws full of blunt cutters not so many now.
 |
 |
 |
 |
|
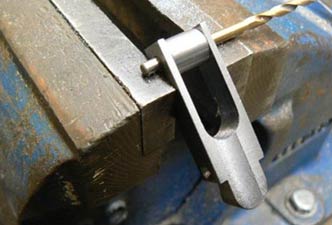
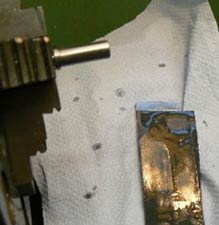
This the gearbox end of the universal joint, I made a cutter out of gauge plate hardened and tempered to form the ball. Then into the milling machine to drill and ream the hole for the drive pin. |
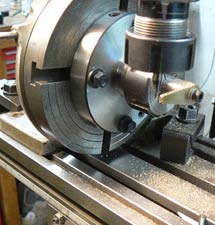
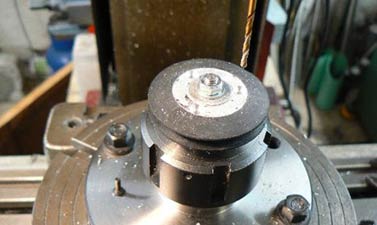
The rear wheels come with the rubber tyre bonded onto the aluminium disc, made a simple jig to hold the wheels. Six to do and then it went to Aaron to do his wheels. Centred the wheel up with a centre in the tail stock clamped it up then bored the centre to suite the hubs. |
||
|
|
|
Progress on the car. With the engine sitting in the car it rocked about as the bottom of the engine lugs were as cast. Engine stripped down, into the milling machine and lugs milled flat. |
|
|
|
Did the pipe brackets on my CNC machine. They took 15 minutes each to do, it would have taken a lot longer on the milling machine. One for me and one for Aaron. |
|
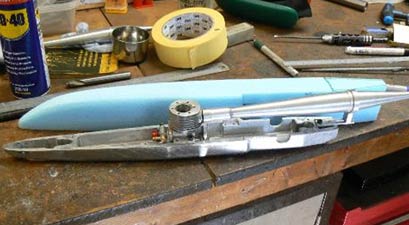
The car is pretty much finished, it now needs a top. The instructions in the kit say wood, I much prefer fibre glass tops, much more forgiving in use. |
 |
 |
 |
|
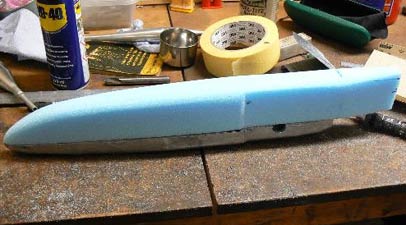
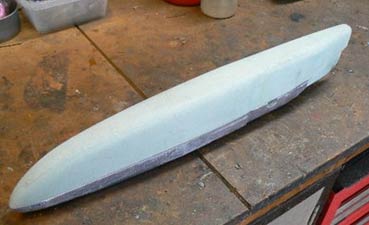
Blue foam is easy to work with, it can be cut on a band saw and sands very easily. The plug is made about 0.5mm smaller than the car chassis this allows for the fibre glass. |
|
 |
 |
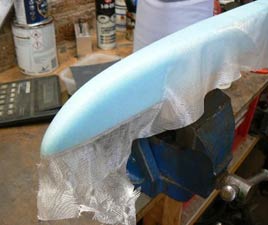
If you make a mistake you can cut it off and glue another bit on with two-pack epoxy, super glue melts the foam. Sand the plug as smooth as you can using 400 wet and dry. No need to worry on how to get the plug out. You need to use 25 gsm glass cloth, it's used for skinning model aircraft wings. To get it to go onto the plug it needs to be bias cut (cut it into strips at 45 degrees across the cloth) you can pull round quite a bit. The whole plug was done with one piece of cloth per layer.
 |
 |
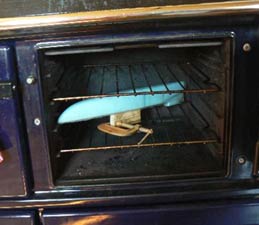 |
Lay the glass onto the dry plug and working from the front apply the resin with a brush, you will be able to pull it round the curves, see first picture. When it's cured, trim of the rest of the surplus glass and sand it smooth. Then more layers of glass, you should be able to get four to six layers on now. Trim the glass each time you lay up and cure, the cured glass is easier to trim with a Dremel and cutting disc. This top had 26 layers of glass, honest, it’s not as bad as it sounds. You will only manage to get two or three layers on the first time. Trim the surplus glass off close to the bottom of the plug. It was cold when I laid up the top so it was cured in the oven overnight at 25°C.
 |
 |
|
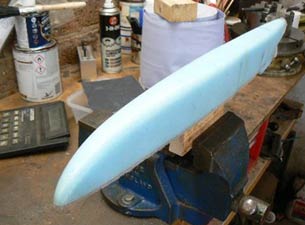
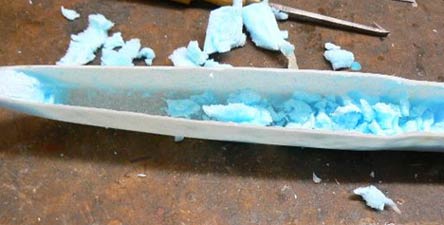
Dig the foam out with a chisel. Any hard to get to areas wash out with cellulose thinners. The completed top in the second picture is how it came off the plug, minimal finishing required. |
This is the car ready for painting, some pressure on now that Buckminster is opening, need to get it finished. |
 |
 |
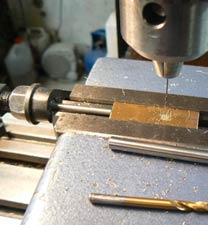
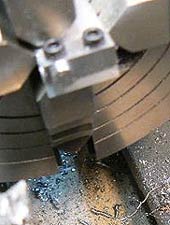
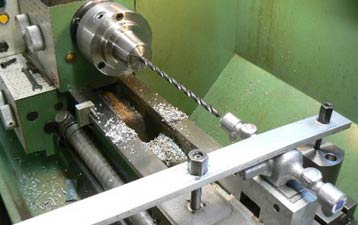
As promised here is the drilling of the Trackmaster back axle, after spot drilling it was done in three stages. First was a stub drill to start the hole with no wander, then a standard jobber drill and finally with an extra-long series drill. The hole is 9mm diameter, used that size as I only have metric collets for the lathe. Why not a drill chuck, they don’t run as true as a collet and I wanted the hole to come out in the right place.
For next month I have got the Ian Moore No 12 out to do some more work on, got some front tyres and they need hubs amongst other not very exciting work.
Opening Buckminster could have thrown a spanner in the works though.
©copyrightOliverMonk2020