|
Home Updates Hydros Cars Engines Contacts Links Racing ←2018 →2020 Contact On The Wire |
|
|
Oliver Monk 'Workshop Ramblings' 2019 |
January 2019
|
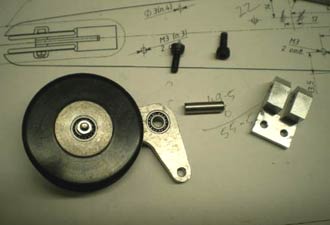
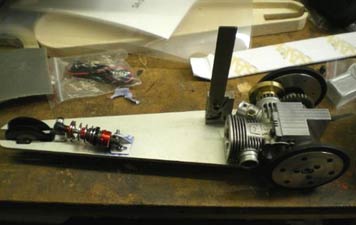
I am typing this to the smell of oranges cooking. Every January I make a year’s supply of Seville marmalade, so it must be the new year, with lots to look forward to. I had been lacking a bit of motivation since I broke the 2.5cc British tether car record and the follow up run in Poland at a similar speed but I have now ventured back into the workshop. This is a Russian 2.1cc Junior tether car kit produced by Lev Sprints, I collected it in Tallinn last year. It is powered by a Novarossi 12(2.1cc) size engine, the cars are quick capable of over 100mph. It has been suggested it might be a good introduction to tether car racing for seniors as well. It comes with a full set of drawings and instructions in Russian, I have a Google translation of the instructions but as all men do, I will only look at the instructions as a last resort. |
|
|
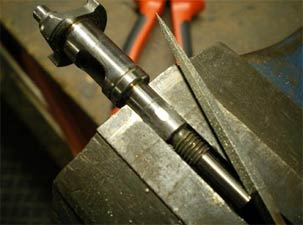
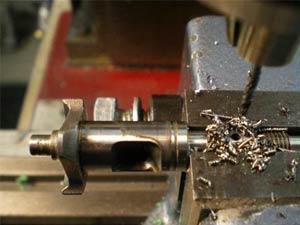
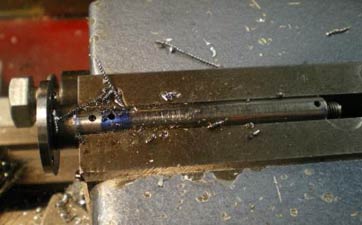
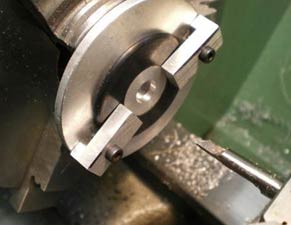
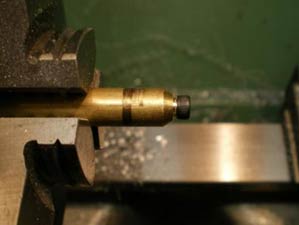
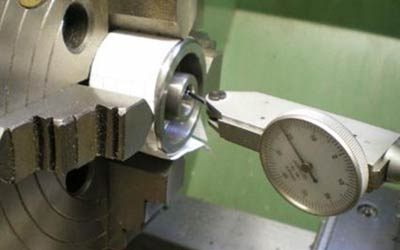
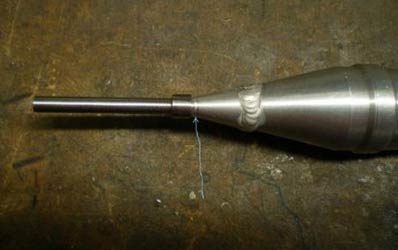
This was the first task, drill a hole for the gear drive pin through the crankshaft. If I could do it the project was on, I bought my Novarossi from Ebay less than £90 so it was worth a try. Filed through the case hardening with a diamond file and then drilled through with a 2mm tungsten carbide drill nice and slow with plenty of lubricant. |
|
|
The pictures are a bit dark, I have put some LED lighting in parts of the workshop, nice and bright, but my camera doesn’t seem able to cope. The lights are a big improvement but take a bit of getting used to and they have a bit of a stroboscopic effect on the machines.
|
|
|
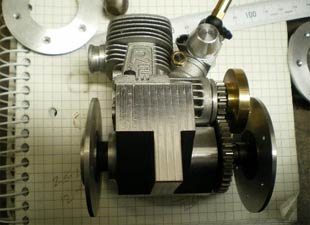
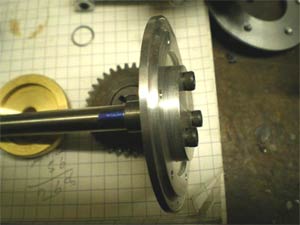
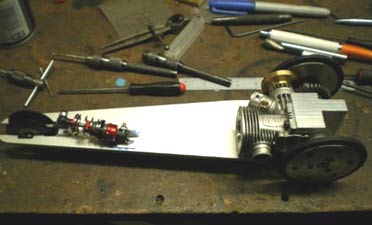
The engine and axle mount comes fully machined and predrilled and tapped for the Novarossi and my 2.5cc Picco engine also fits. The engine sat a little proud of the bearers so I milled a slot so it fitted. Next job was to press in the bearings for the axle. |
The axle was a very tight fit in the bearing and the diameter had to be reduced a little, the easy way to do it in the lathe with emery paper on a flat strip of metal. With the axle in the bearings wheels and gears fitted something was not right the flywheel was fouling the wheel (you will see I have shortened the crankshaft).
|
|
|
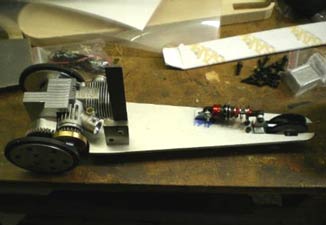
After a bit of thought and fiddling about I realised the hole in the axle for the drive pin was in the wrong place, drilled a new hole and made a couple of spacers for each of the axles. Problem solved. |
In the picture below is one of the spacers I made and the brass flywheel that needed a small mod so the gear on the crankshaft fitted. The cylinder head about to be modified.
 |
 |
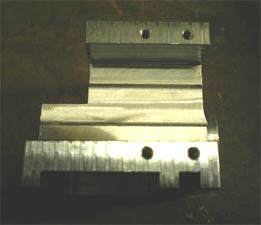
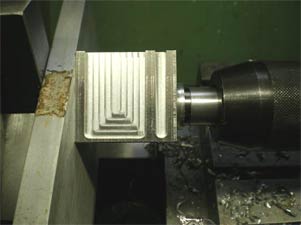
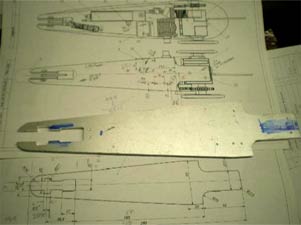
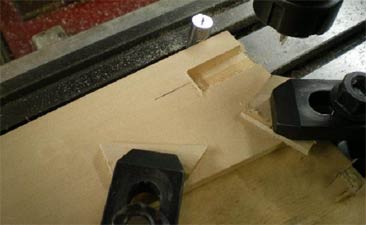
Below is the chassis plate, comes as a blank and needs all the holes and cut outs doing. I have cheated and set up on my milling machine and did the lot. This kit is for juniors and it would be made at an engineering "youth club" where they would be learning basic engineering skills and would be done by traditional marking out techniques and files.
 |
 |
Next month I will continue with the front suspension and shut off.
|
|
|
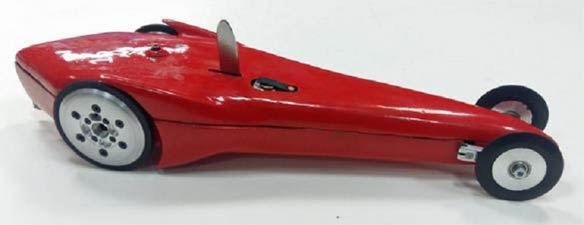
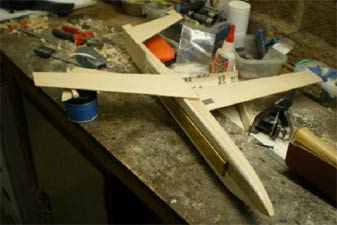
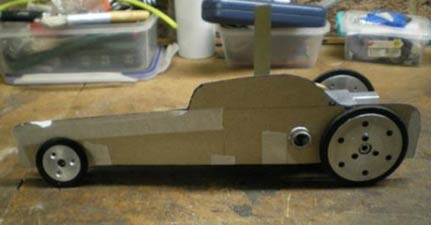
The picture above is what the finished car will look like, to me it’s not pretty. The car on the right is better looking. Plans are afoot to make it look like an American hot rod. Don’t rush out and buy the kit yet unless you want the basic model. Lev has a website where you can buy the bits separately and build something different using the parts, more to follow.
 |
 |
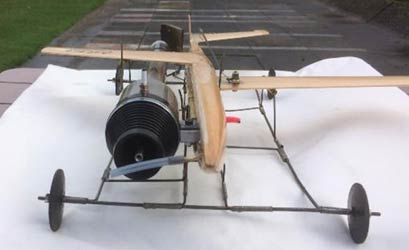
I enjoyed last years pulse jet flying, this is the new model for this year, a new more powerful jet. The milling machine has been pressed into action on the aeromodelling side as well. Getting all the flying surfaces and engine lined up correctly is important, the mill makes it a lot easier.
The workshop is not the warmest place at the moment but will continue with the junior car. I have to do some work on a new 2.5cc engine I bought in the summer ready for this year racing season. Some new pistons for 1.5,2.5 and 5cc engines to do. And finish the jet model.
March 2019
 |
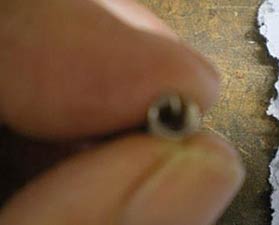 |
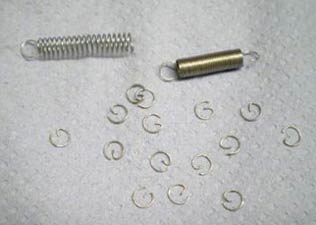
Not my best work as a photographer. Circlips are not always the easiest things to source but they are easy to make. These are for my 5cc engine, you need to find a spring that has the same diameter wire and outside diameter as your existing clips. First step, as the second picture, bend down the tail with long nose pliers then cut off with a sharp pair of wire cutters, then if required, smooth the end of the wire with a diamond file. You won't throw many of them in the bin until you get the hang of it.
|
|
|
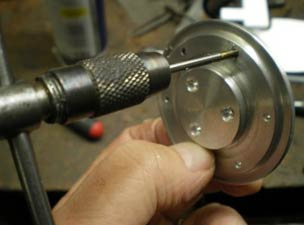
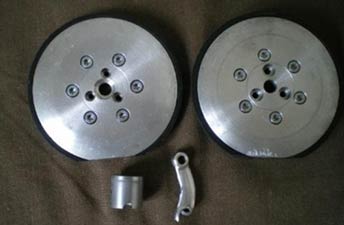
Back on with the Russian junior car, this is the part for the front suspension. The bearings need fitting to the wheels. First job was to bore out the holes in the wheels using a jig that I had made for another project. |
The bearings are a press fit, a bit of Loctite retainer could be used to make sure they stay in place.
 |
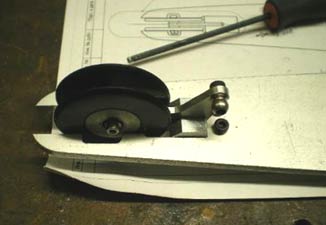 |
The wheels all assembled and fitted to the chassis plate, I had to make the pin from a bit of silver steel.
 |
 |
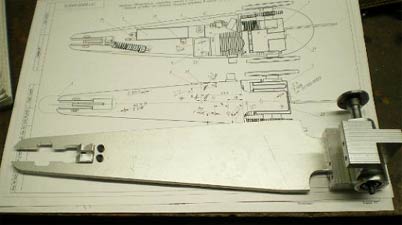
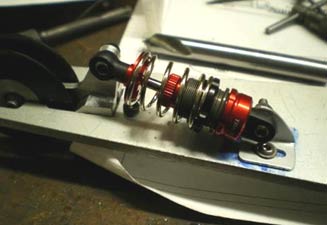
The front shock absorber fitted, just needed a little bracket making with a slot so that the ride height of the car can be altered. Decided I would put the back wheels on, found that none of the holes had been tapped in wheels. Twelve holes to tap in M2.5, just go steady and use WD 40 as a cutting lubricant and of course sharp taps.
 |
 |
The screws to hold the wheel halves are supplied as part of the kit but the heads are too big for the counter bores in the wheel. I took the easy option and turned the heads down to fit. The other option would have been to increase the diameter of the counter bores.
 |
 |
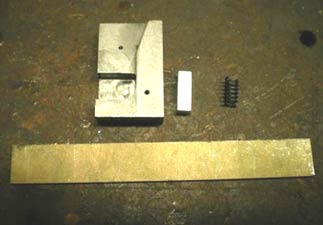
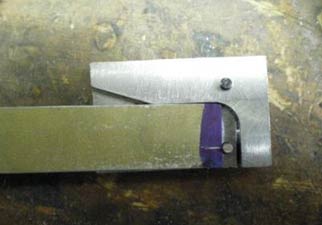
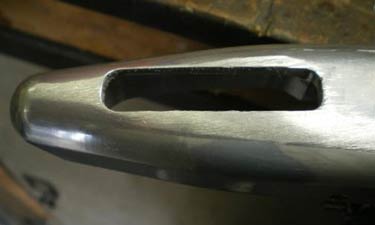
The parts for the shut off. No drawing was supplied but you can find an assembly drawing on Lev's website http://bystryi.silnyi.ru/ in the shop part of the site. Google translate is your friend. The first operation (right) is to open out the slot on the end of the block with a file, it needs a flat bottom and to be a bit wider.
 |
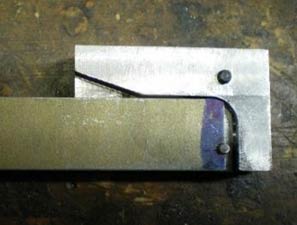 |
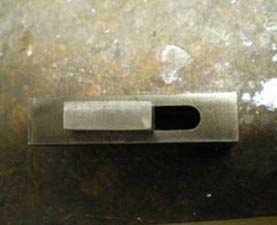
In the left-hand picture, you can see the block in place with the pivot hole drill and a pin fitted. The shut off arm has had a half round filed into it to fit on the pin.
 |
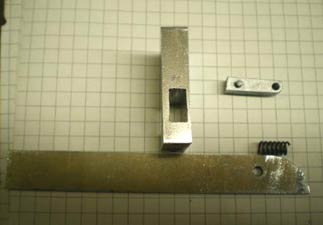 |
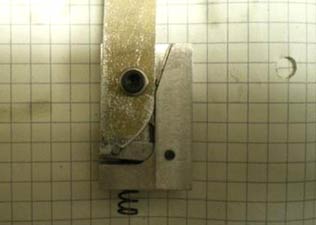
The first picture shows the completed shut off and the second its parts. The shut off action needs to be positive and lock in the open position, so when the car is bumping along the track you don’t want it to go off on its own. It will feel quite hard to operate but that is what it needs, the brush on the track will shut the car off, no problem. The curved part of the arm just needs to be smooth enough to reset it.
 |
 |
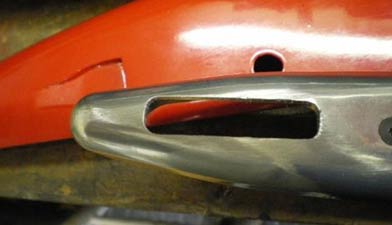
Here’s the shut off fitted to the car and inline with the needle valve. The arm will just need cutting to the right length when the body is fitted.
 |
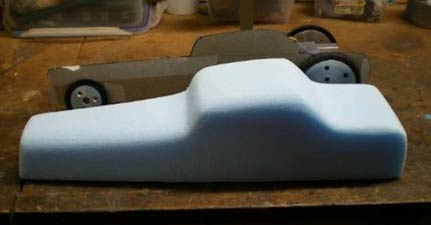 |
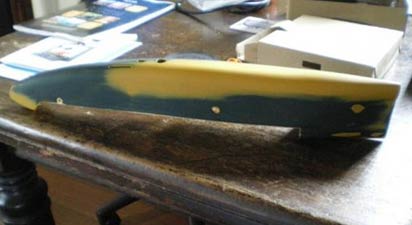
I really didn’t like the body style of the original car and I won’t make it as a junior anymore. I have done some 'CAD work', cardboard aided design, and done a hot rod styled car. The blue foam plug is ready and the glass will get laid up when it gets a bit warmer. Next time should see some revised front suspension, the modification of the needle valve, perhaps the tank and the new top.
Cylinder Head and Liner Shims
 |
 |
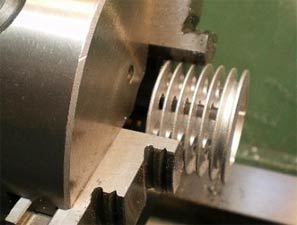
Just a recap on how to make shims for the head or liner. Cut out squares of brass shim various thickness' a bit bigger than the OD of the shim required. (KS do a small pack of various sized shim brass). I just use some scrap aluminium and bolt the brass squares under a metal plate, then drill and bore to size, plus a bit, liner bores vary in size. The second picture shows the machining of the OD, make a mandrel that is bigger than the OD of the shims, then turn a spigot on it to fit the shims ID. You can then use the clamping plate to hold the shims in place, just saw off the excess material, tap the end of the mandrel and use a big washer to hold it all in place. Then turn to the required OD, you will have bits of shim sticking out but it turns no problem.
That’s it for this month, more next time, not sure what yet but I know I have some pistons to make and three unfinished cars. The jet, with luck, should have flown by then, weather permitting.
July 2019
I was conscious that I had not written for OTW for quite some time, the last being February this year. Most of the work I have been doing is repetition of what I have done in the past, I don’t want to write it again and I am sure you don’t want to read it.
|
I bought a Picco 5cc car kit as I had not had a Class 4 car before. I put this together, mainly a fitting job and a bit of machining, ready for the last race of the season at Kapfenhardt. The engine felt really nice so I gave it a gentle run in the car. The engine went very tight so that was the chance of running it gone for the Lucia race in Kapfenhardt. The problem turned out to be the wrist pin hole was not square in the piston you could measure the difference side to side with a digital calliper. A new piston was made along with the tooling that is required to hold the piston for the various machining operations.
|
|
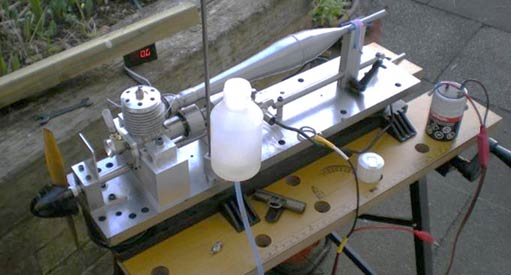
Above is the 5cc engine in my test rig. It was built to run 2.5cc engines so it needed a new engine mount making and a couple of modifications to get it in. Well the engine ran OK, the propeller was a little small an old class B team race one I made many years ago. It came onto the pipe very quickly and was shut down at 32,000rpm. So, it was ready for the Hannover race. My OPS 29 team race motor never did anything like that.
In Hannover after a lot of effort we got it to go round and round but decided not to run it in the race as the flywheel had come loose.
 |
 |
The taper in the flywheel was scored when it came loose so it was set up to run true in the lathe and the taper re machined. The collet was also damaged and a new one was made to get the tapers to match. I machine the collet on the same setting as the flywheel but run the lathe in reverse so I can turn it on the side.
 |
 |
The front of the car was bottoming out and damaging the pan so another bump stop was fitted and the scratches polished out.
 |
 |
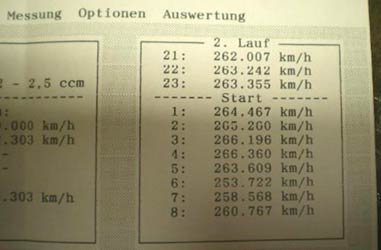
The time sheet is from my first run at Hannover with my 2.5cc car. Some time during laps 4-5 the stinger broke off the pipe, it’s interesting that initially the speed dropped off but it started to pick up again by the end of the run. The breakage occurred where it is marked on the photo (I had repaired by the time the photo was taken). Also had to make a new stinger.
|
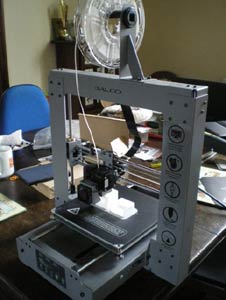
I have always wanted a 3D printer and Aldi were doing a reduced price on them, so I invested. I printed off some of the items from the files supplied with the machine, not much use other than learning to set up and use the machine. I searched the internet for something useful to make, no joy. I have started the journey with Fusion 360 3D CAD package that is available for free with certain conditions, it’s a slow process. The last time I drew in CAD was with AutoCAD 12 in DOS, that was a long time ago. The printer is printing a battery box that I drew from a YouTube 360 training video. |
|
|
|
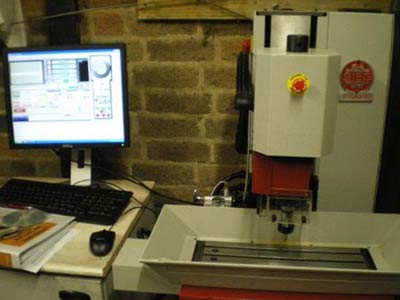
Whilst all this was going on, I also bought a small CNC milling machine from Arc Euro at a very good price. It is controlled with Mach 3, which is an entry level package. I have done a few bits with the files supplied. I am still busy drawing, it’s a slow process but I have a couple of projects drawn and the milling cutters are on order, and I just have to do the CAM files. Youtube has the training videos and I am working my through them. Then I can start cutting some metal, got a few more ideas for projects for the CNC miller. The 3D printer doesn’t seem to be as useful at the moment.
|
The Kapfenhardt race was not a success for me,
the 2.5cc car engine dropped the rod at around 250 kph. Don’t really know
why as the big end had not seized, must have been metal fatigue. Flat wheels
and a badly scratched body now in primer ready for Aaron to paint.
 |
 |
All the repair work is done, new conrod and new piston, luckily the liner survived. The flywheel had come loose and bent the securing bolt, made four while I was set up to do it. The wheels come part machined, the tyre part is all complete, the parts that fit to the gearbox need to be machined. If anyone is interested, I can write it up.
 |
 |
The new pulse jet model I have built over the winter had its first few flights early on in the year. It did a whisker under 140mph, hope there is more to come. Barton has reopened now so one more chance to run it this year. I won’t be at the Nationals, going to Basel tether car racing.
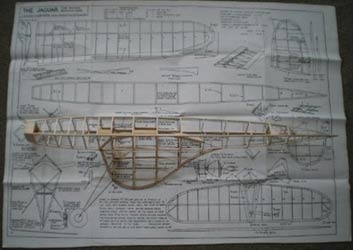
Some of you already know that over the winter Debby and I bought our first static caravan at the seaside. I have been building free flight models rather than sitting watching the tele. So far KK Achilles, KK Senator and now I am working on an Evan’s Jaguar Wakefield. I have always wanted to build this model since I was a lad and with plans being readily available on the internet and a local print shop who can do them full size, plus laser cut parts, makes it a lot easier to build.
That’s all for now, next time I hope to have some pictures of parts I have made on the CNC mill and I may have picked up one of my stalled projects.
©copyrightOliverMonk2019