|
Home Updates Hydros Cars Engines Contacts Links Racing ←Previous Next→ Contact On The Wire |
|
|
John Goodall Building and racing retro tethered cars |
Tale of Two Slabangs and some Twins I have already
described my original Swedish Slabang
car on an earlier page, following the auction it can be compared with John
Oliver’s version. John built his car after obtaining the chassis and
front suspension off Ulf Ek in Sweden the second time he went with me to
Orebro. Ulf Ek was co-driver to Stig Blomqvist in the Audi Quattro when
they won a number of World Rally Championships. Ulf took me back to the
airport on one occasion and he does not hang about, in spite of the
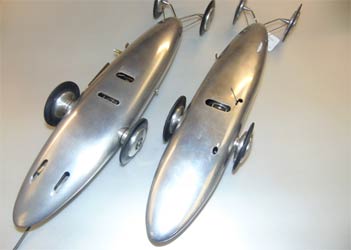
draconian police measures if they catch you?? The two cars side by side
show the differences in approach. I used a badly filed up engine that
came from Peter Hill in poor condition. JSO overhauled it for me and I
refinish the cases by hand as shown. It has run several times since,
getting faster each time culminating in its last three timed runs at
100mph plus. The track is standard Oliver Tiger twinshaft, which
puts it at a disadvantage to the Swedish and JSO car engines, which have
a much narrower track of 87mm. The standard track with more frontal area
of course is 102mm. John built this engine especially for the car and it
utilises standard screw fixing at the front with a clamp at the rear, so
it is unlike any other Oliver Twin Shaft engine with its mounting system
and shorter drive shafts. The Swedes use three clamps on their engines
with one at the rear and one each side. So both John's car and engine
are unique and dedicated to each other. It was also the last car John
ever ran on his last visit with me to Orebro. So it is very special to
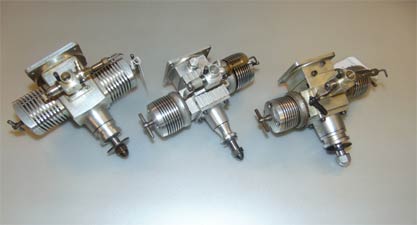
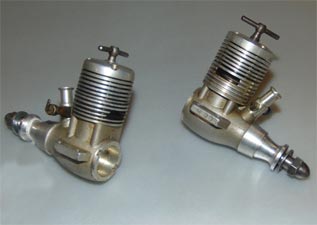
me. The engines I think need little explanation except one of the twins was
built by Ray Ivey a good friend of John who worked for RCV when they
helped sort some of the problems with prototype engines. John assisted
Ray in the design and supply of parts for this engine, which has the
fluted crankcase. The two MK4 Tiger based engines were two of the three
prototypes for the MK5, schneurle ported engine one has a side exhaust
and the other rear exhaust. The engine with standard Oliver cooling fins is 5cc
total and the second is about 6.5cc and schneurle ported. John only made
one of each. The ex Ray Ivey engine was given to me by John in
dismantled and damaged condition when he last came here to stay with us.
He had supplied advice and some of the parts including the cylinder
assemblies to Ray. It had a broken crank and is now in running condition
again.
Renovation of a 'Mystery' Car
Photos by John Goodall and 'Luke'. Text John and OTW
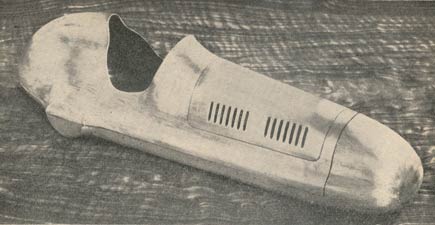
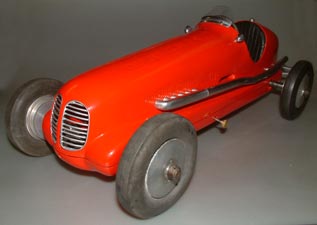
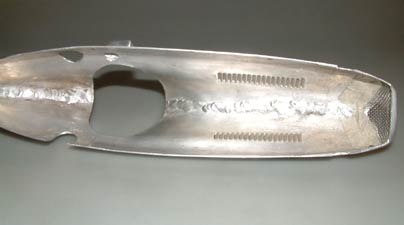
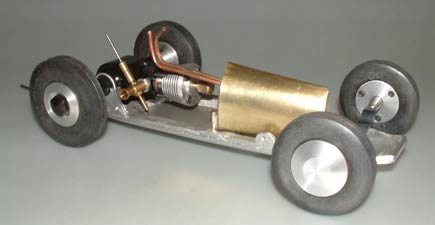
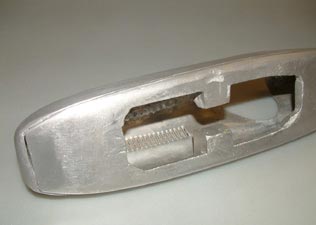
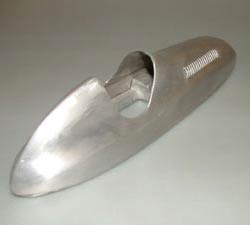
In 2016, OTW was contacted by the then owner of the car asking if we knew anything about it and possible routes for selling it. What was immediately obvious was that the body and pan were either a commercial product that we had no knowledge of or that it had been built by a very competent engineer. There was a further clue in that the motor was homebuilt with a McCoy type monobloc crankcase casting. As was often the case, there is a cover over the transfer port indicating that this had been machined from the outside, rather than cast in. The timer may well have been a commercial unit. ZN wheels and tyres at the front, and we suspect wire wheels at the rear, all with faux brake drums finished off what was very close to being a scale car. The rear wheels had gone missing, just the hubs remaining. The flywheel unit was also missing, but importantly, the magneto that runs from a separate bevel gear on the back axle was still in place. A fascinating car.
 |
 |
 |
|
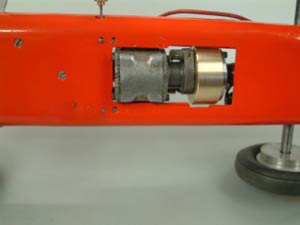
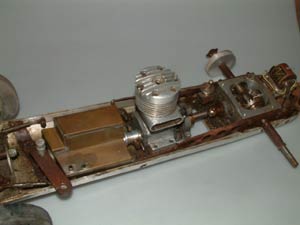
Car as originally found showing the level of workmanship and the lack of rear wheels |
||
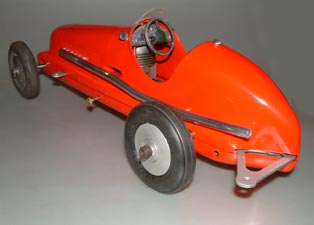
A short while later, John Goodall sent us further photos of the car cleaned up somewhat, but otherwise untouched, which is how it remained until well into 2018 when we were delighted to see it in the flesh for the first time at a Retro Club meeting. Over the winter John undertook the renovation/restoration of the car and continues the story below.
 |
 |
 |
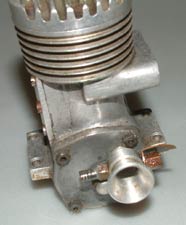 |
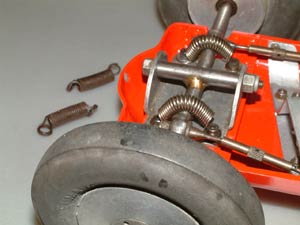
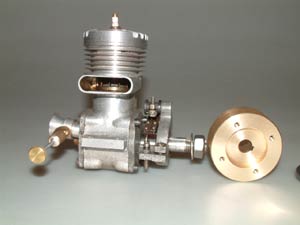
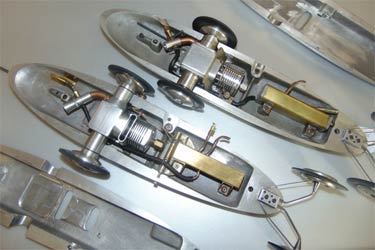
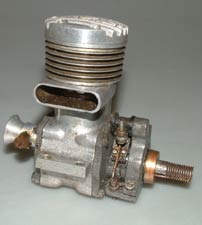
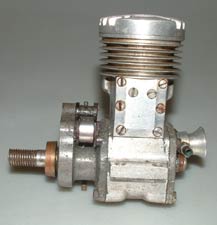
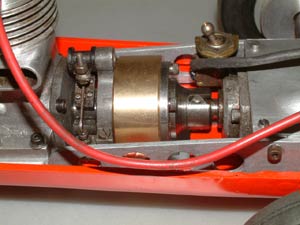
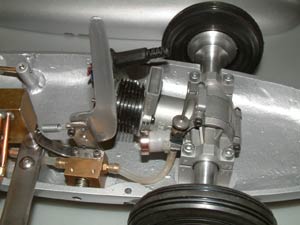
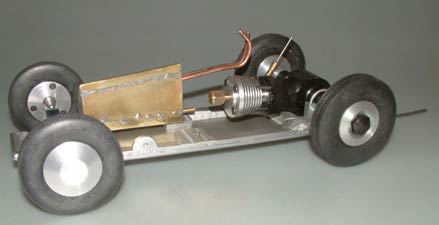
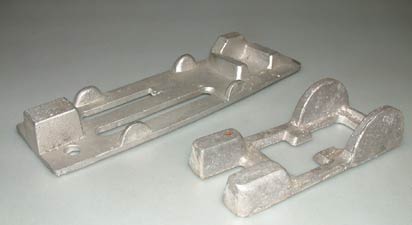
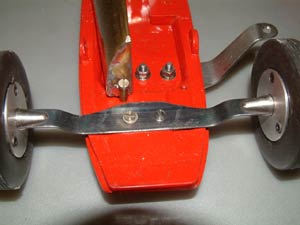
| Motor mount and radius arms to gearbox | Fine, home built, RRV motor. | ||
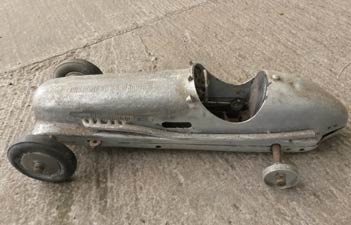
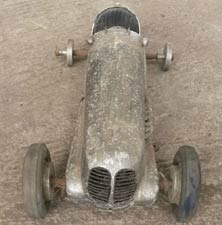
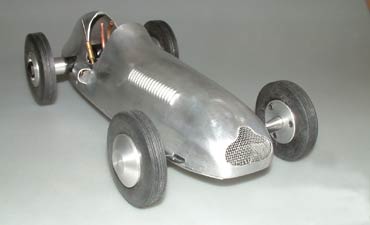
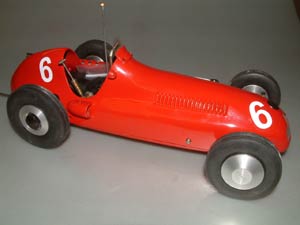
This is my latest rendition of a car I bought about two years back. When sold to me the vendor thought it was an Arthur Weaver car and although engine mount and some other details are similar and representative of his work other items are less obvious, unless it is one of his early efforts? The bodywork is very nice and there is a lot of detail. I have had some instrument decals printed as none seemed available on the internet. I also added a cut out as none had been fitted and mounted it in the low tension side of the magneto ignition. I also replaced the missing rear wheels and made the wind screen and exhaust pipe due to corrosion in the original.
I include above a few pictures of the engine which is very interesting in having magnesium front and rear housings also the timer frame in this material. This suggests someone built the engine with access to fairly scarce materials at this point in time, maybe someone in the aircraft industry? The engine is very well made with excellent compression on the ringed piston and fits are superb too. Interestingly the backplate is stamped 2, which could suggest another is in existence, or might have been?
|
|
|
|
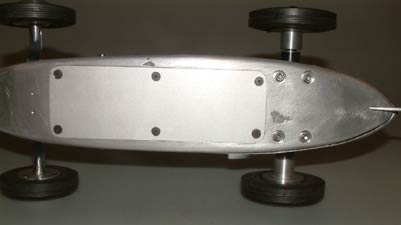
| Cut out in pan to lower engine | New front springs | New flywheel with keyway |
 |
 |
 |
|
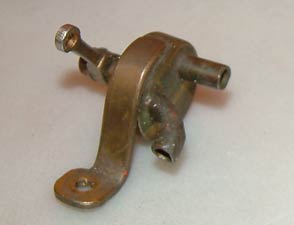
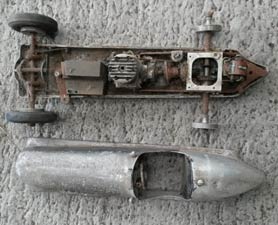
The original flywheel was missing so I made a new one, doing all the turning and cutting the keyway using the lathe top slide. The direct drive flywheel and original coupling is shown above right. The front springs I have now made in stainless steel, shown with old for comparison. The engine and gearbox are mounted as one unit with radius arms and was angled down, I suggest to clear the body work and so a cut out in the chassis was needed. I believe this fuel cut off valve was made for the car and mounted just in front of the engine on the off side. It allows air through it now in the off position, so was not re-used. Cork was often used as the sealing element and from my vintage motorcycle experience, petrol taps with cork seals dry out with little use and become unusable. Boiling in wax sometimes helps to revive them, but this unit cannot be dismantled. |
|
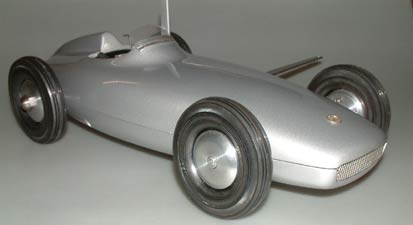
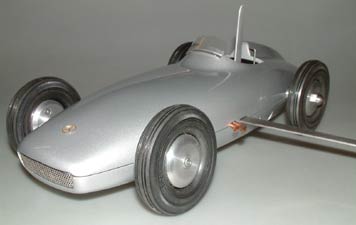
The Mercedes came to me from Steve Betney as a project kit when he had his last sale, with partially cleaned up US sourced castings bought off an Ebay seller, Vega wheels with tyres and a Forster 29 nicely converted to twin shaft. The engine was converted to twin shaft with clamp type engine mounts by a surgeon who made many conversions apparently and who used to visit France regularly. He knew Michel Moline who sold to Steve?
 |
 |
 |
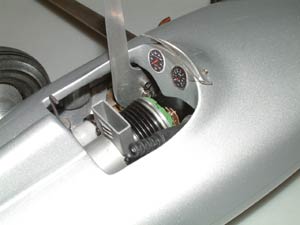
| Cockpit view | Fuel tank filled from outside the car | 'Twinshaft' Forster and cut off |
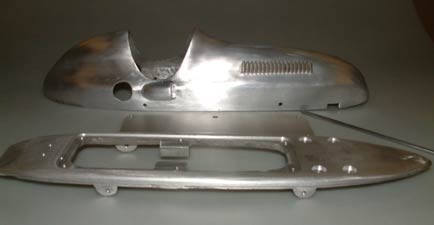
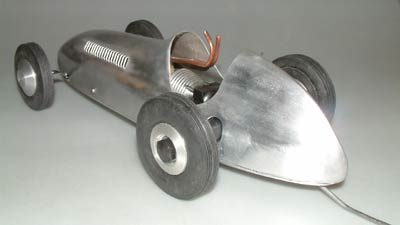
The body was not symmetrical each side having the maximum curvature different on one side to the other when viewed from above and when viewed from the front not symmetrical in section either. This caused me much grief to get it looking acceptably correct to the eye. I had to realign the nose taking off 1/4" one side to make it look square?? Then much polishing with file and emery, which made me end up painting it to fill and hide the porosity evident. Not good castings at all? I had to make new wheels with extended inner hubs at the rear to clear the body work using the Vega tyres only from the wheels that came with it. This forced me to make new wheels at the front to match the rears more closely.
 |
 |
|
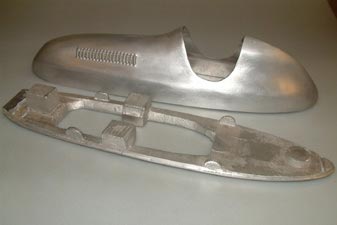
Almost a W196 but without the exhausts, air scoop or louvres |
|
I decided to use torsion bar front suspension as an experiment really and felt it was fairly neat and sound. The cut out was an incomplete item I found in my spares box, which I finished and adapted to fit with new arm and return spring, it works well and will not reset back on unintentionally. The glow plug jack plug is mounted on a SS bracket with silver soldered stiffener. The tank is fabricated from two "U" shaped pieces of brass and cold soldered as is usual with silver soldered brass mounts raised to get the fuel level correct. I finished it all off with a windscreen made from Perspex and trapped in a shaped "U" folded piece of alloy secured with 10BA screws.
A 'unique' 2.5cc ZN car?
|
|
There has always been a deal of conjecture as to whether the GP style body sets that ZN featured in their publicity photos in 1950 and 1951 ever made it into production? The suspension system also shown was intended for the MCN GP Special but like the series of engines illustrated, never apparently pursued, possibly down to the imposition of purchase tax on model items, or more likely that this aspect of the sport was in serious decline by then? Paul Zere and his ZN company did continue to supply cars and items for competitive racing for some time though? The following from John Goodall indicates that a 2.5cc version might have been produced, but the existence of the larger car seen here has never been confirmed, although it does appear in photos. |
Possibly the rarest of British cars are the two ZN scale bodies that were planned, the one shown above for up to 10cc engines and a similar version for the G Arthur-Brand designed MCN car, but like their engines, never seemingly made it into production. Amongst the items sold by Alan Whitehead several years ago was this smaller version also believed to be by ZN. John has now completed building this unique? example.
 |
 |
The current rebuild project, which I have now completed, is this very nice original ZN alloy louvered body and cast pan I obtained from Gordon Yates in Barton Under Needwood, who went to school with my son Paul. I have done a lot of work on this since I got it, the body now fits the pan and is straight. I put one of Ian Russell's Jaguar twin shaft replicas in it, in order that it could be run, but wish to avoid loss of too much originality! The cast in chassis cut-outs I intend covering with an alloy plate so fuel drop is minimised, this will be screwed on with 6BA screws and sealed with silicone. Gordon had made the tank for another car and had also added a filler front and rear of the chassis to give more support to the body shell. This was pressed in two pieces and then welded to join. The chassis was probably adapted to supply with the body from another car altogether, but is ZN. I say this because the engine mount blocks which I have machined off place the engine under the bonnet front and would spoil the shell.
 |
 |
I made up a filler plate set into a milled recess on the underside of the chassis to stiffen and add a site for the pan handle yet to be added as is the fuel cut off. I utilized the Twin Shaft Jaguar replica by Rustler by making up new wheel hubs and fixing nuts as Oliver usual practice.
 |
 |
I also removed the front axle mounting block to allow fitting a spring steel mount for stub axles and placed the bearing outboard as space was limited to get the track correct. I have fitted anti lift device into a hole drilled at twenty degrees through a cast in pad at the chassis rear as in the Slabang.
 |
 |
| The grill will be fixed along with the nose badge using silicon after painting. | |
 |
 |
 |
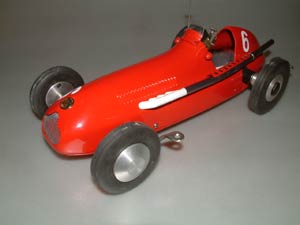
T
hree pictures of my finished ZN car, now stove enamelled in Moto Guzzi red. I have added some scale detail, a dummy exhaust manifold, filed out of the solid, with a titanium pipe, dummy mirrors and screen. The spring steel front suspension is possibly the most simple type to make and I cut this from 0.032” spring steel sheet, The holes were drilled using Cobalt drills. Always ensure you have a disposable steel support below and preferably above clamped together which prevents the spring steel distorting and blunting the drill prematurely. I used steel rivets to secure the steel ¼” diameter stub axle to the spring.
 |
 |
 |
©copyrightJphnGoodallOTW2020